These items came about because I purchased something in a rather stiff clear plastic 'blister pack' and wanted to use the packaging for something. They are of interest to a toy soldier scene as the pond constitutes an item of scenery and the marshy ground is of course impassible to trucks and tanks.
The base of the pond is pre-painted card (ex cornflake packet or tea-bag box), the colour of pond water is a problem, water only looks blue when viewed at a shallow angle on a clear day when you get a strong reflection from the sky. Ponds are usually seen closer to and at a steeper angle so they tend to be grey. I usually opt for a basic greyish colour with just a hint of blue.
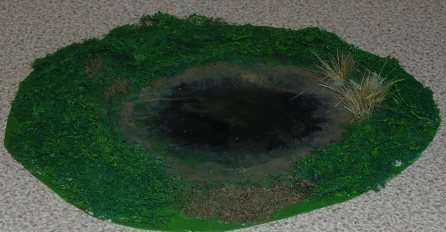
On the base the pond area is painted a light earth colour around the edges, gradually darkening to dark grey toward the centre with traces of blue creeping in for reflected 'sky'. You will need about an inch to an inch and a half (25-35mm) around the pond itself clear for gluing down the surface materials. I had the back end of a vehicle I was going to add sticking out of the pond so the centre of this one is very dark to suggest depth. Once the painting has dried you can iron the card flat between two sheets of Bacofoil if it has warped (which it usually does).
Lay the clear plastic over the 'pond' and use a CD marker pen or similar to draw on the plastic about half an inch outside the pond itself, this is then cut out. If you plan to have reeds (bristles from a decorators paste brush) in the water cut some holes in the clear plastic where these will go, a paper hole punch is good for this. This allows the reeds to stick to the card base rather than the clear plastic (which often doesn't take PVA glue so well). When happy lay the clear plastic on the base and run some Uhu all round the edges to secure it (if you put Uhu on the underside of the plastic when you press it down it squish's under the visible area and looks wrong).
The 'grass' is pan scourer (teased and painted before being used) stuck down with Uhu onto the base and over the outer edges of the 'pond'. This extends up to the light painted area on the base. In one corner of the example shown there is a raised bank, a bit of corrugated cardboard box pre-painted and glued onto the base before adding the 'grass'. The reeds are cut from a cheap decorators paste brush from a 'pound shop', placed into a small blob of PVA and with some fine dried tea leaves tipped on around them (this helps keep the reeds upright as the glue dries, the surplus tea or flocking is then shaken off). There is a patch of bare earth at the lowest point on the edge of the pond, where farm animals have come to take a drink. This is represented by dried tea leaves, which come out a brownish hue, the stuff out of tea bags is generally fine and makes good 'mud'.
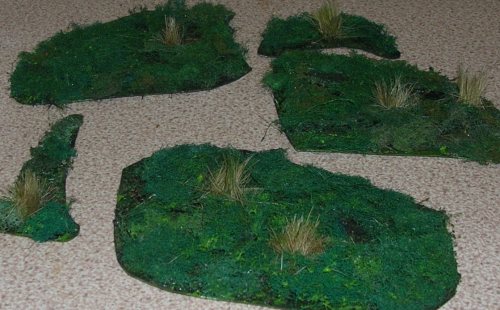
The marsh area is marked by a selection of pieces of various sizes, three larger bits and half a dozen smaller pieces for the fringes of the area. This is because the surface is very rough and not suitable for figures, but the soldiers can be placed between the pieces.
The bases are pre-painted in a murky mix of black, dark grey and very dark green. When dry this can be ironed flat if it has warped. Scraps of the clear plastic are then glued on with Uhu (you can put the glue on the underside of the clear plastic for this job) to represent puddles. To give a more uneven surface I added some short lengths of painted match stick and scraps of painted card to the base. The grass is pre-teased and painted scouring pad glued down with Uhu and the reeds are from the decorators brush mentioned above.
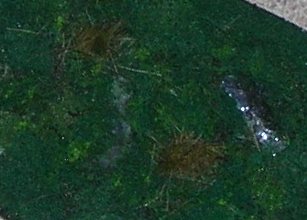
The picture below taken from above shows the glint of the puddles set into the terrain, the effect as you pass over the piece (clutching the small model aeroplane) is quite pleasing.